Pneumatic vs Hydraulic Transmission: A Comparative Analysis
Imagine the heart of an industrial machine, tirelessly converting power into motion, driving production lines, or lifting heavy loads with…
With the development of science and technology, the application of hydraulic transmission technology is becoming increasingly widespread, and the proportion of hydraulic equipment in various industries of the national economy is steadily increasing. In practical applications, a well-designed hydraulic transmission system that is used according to standardized operations generally has a very low failure rate.
However, if installation, debugging, usage, and maintenance are not done properly, various faults may occur, severely affecting production. Therefore, the quality of installation, usage, debugging, and maintenance directly impacts the service life, performance, and product quality of the equipment. Hence, the installation, debugging, usage, and maintenance of hydraulic systems hold a significant position in hydraulic technology.
This chapter elaborates on various aspects of the installation, debugging, usage, and maintenance of hydraulic systems to lay a foundation for practical application for the readers.
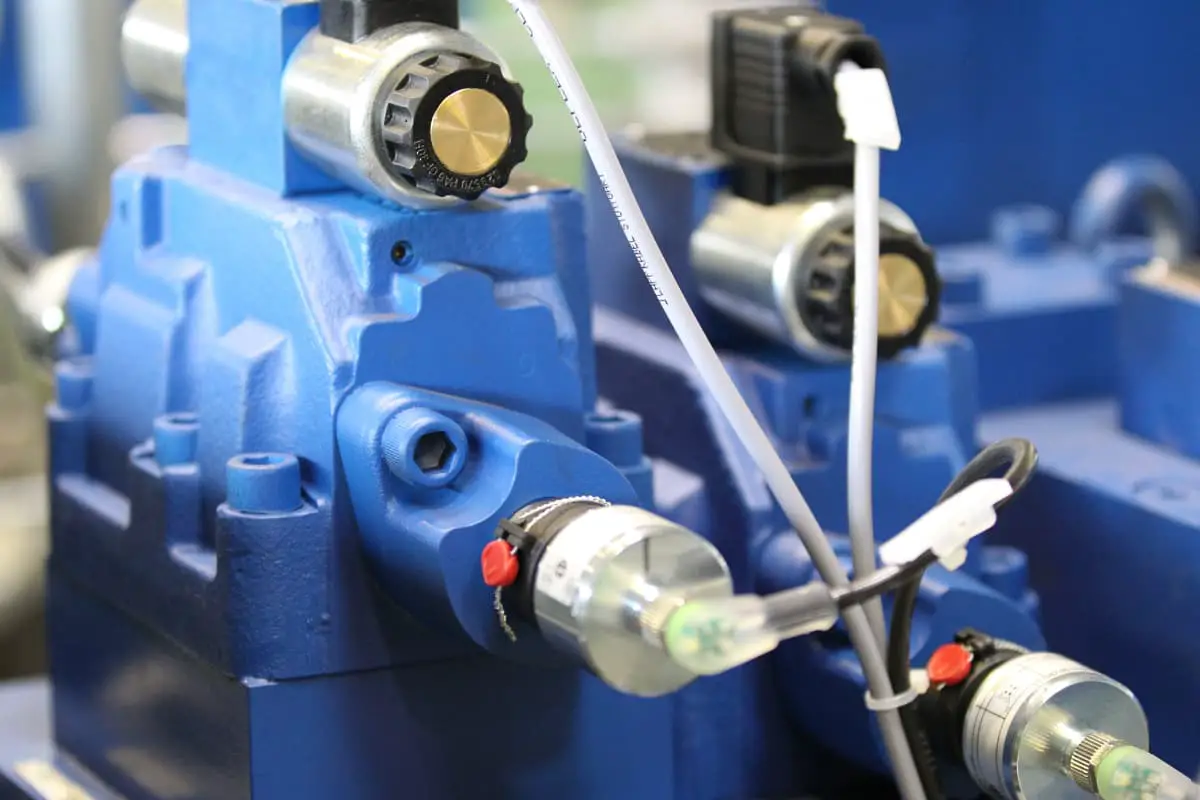
The installation of hydraulic systems includes the installation of hydraulic pipelines, hydraulic components, and auxiliary components. Essentially, it involves connecting various units or components of the system into a circuit through fluid connectors (a general term for oil pipes and joints) or hydraulic integrated blocks.
Hydraulic systems can be divided into integrated (hydraulic station type) and dispersed types based on the connection form of hydraulic control components. Regardless of the form, fluid connectors are needed to connect the system.
In fluid connectors, joints are generally directly connected to integrated blocks or hydraulic components, with the main workload being the connection of pipelines. Therefore, whether the selection of pipelines is reasonable, the installation is correct, and the cleaning is thorough greatly affects the performance of the hydraulic system.
When selecting pipelines, one should choose the appropriate diameter, wall thickness, material, and pipeline based on the system’s pressure, flow rate, working medium, usage environment, and the requirements of components and pipe joints.
The pipeline must have sufficient strength, a smooth and clean inner wall, and be free of sand, rust, and oxide scale. During piping, the neatness and aesthetics of the pipeline, as well as the convenience of installation, usage, and maintenance, should be considered. The length of the pipeline should be as short as possible to reduce pressure loss, delay, and vibration.
When inspecting pipelines, if corrosion or significant discoloration is found on the inner or outer sides, if the pipeline is cut, if there are small holes in the wall, if the surface of the pipeline is dented by more than 10% or even 20% of the pipeline diameter (depending on system requirements), or if the depth of the pipeline wound crack exceeds 10% of the pipeline wall thickness, the pipeline should not be used.
When inspecting pipelines that have been stored for a long time, if severe internal corrosion is found, the inner wall should be thoroughly cleaned with acid, cleaned, and then checked for durability. Only after passing the inspection can the pipeline be installed.
When inspecting bent pipelines, attention should be paid to ensure that the bending radius is not too small. Excessive curvature will increase stress concentration in the pipeline, reducing its fatigue strength and making it more prone to sawtooth wrinkles.
The roundness of large cross-sections should not exceed 15%; the thinning of the outer wall thickness at the bend should not exceed 20% of the pipeline wall thickness; the inner side of the bend should not have any twisting, crushing, or uneven wrinkles. Both the inner and outer sides of the bend should not have sawtooth or irregular shapes. The minimum outer diameter of the flattened bend should be 70% of the original pipe outer diameter.
1) Installation Requirements for Suction Pipelines
The installation of suction pipelines should meet the following requirements:
2) Installation Requirements for Return Pipelines
The installation of return pipelines should meet the following requirements:
3) Installation Requirements for Hydraulic Oil Pipes
The installation position of hydraulic oil pipes should be as close to the equipment and foundation as possible, while also facilitating the connection and maintenance of branch pipes. To prevent hydraulic oil pipes from vibrating, the pipeline should be installed in a firm place. In vibrating areas, damping should be added to eliminate vibration, or wooden blocks and hard rubber pads should be installed on the pipe clamps to prevent metal parts from directly contacting the pipeline.
4) Installation Requirements for Rubber Hoses
Rubber hoses are used for connections between two parts with relative movement. The installation of rubber hoses should meet the following requirements:
The installation and specific requirements of various hydraulic components are detailed in the product manual. Hydraulic components should be cleaned with kerosene before installation, and all hydraulic components should undergo pressure and sealing performance tests.
Installation can begin after passing the tests. Before installation, various automatic control instruments should be calibrated to avoid accidents due to inaccuracies. The following introduces the precautions for installing hydraulic components.
Before installing hydraulic components, check the certificate of conformity and read the manual for the unsealed hydraulic components. If the product is qualified and not stored outdoors for a long time, causing internal rust, no additional tests are needed, and it is not recommended to re-clean and disassemble. If a fault occurs during the test run, only disassemble the component if necessary and after accurate judgment.
Pay attention to the following during installation:
The installation of hydraulic cylinders should be solid and reliable. The piping connection should not be loose, and the installation surface of the cylinder and the sliding surface of the piston should maintain sufficient parallelism and perpendicularity.
Pay attention to the following when installing hydraulic cylinders:
When the hydraulic pump is arranged on a separate oil tank, there are two installation methods: horizontal and vertical. For vertical installation, the pipes and pump are inside the oil tank, making it easier to collect oil leaks and maintain a neat appearance. For horizontal installation, the pipes are exposed, making installation and maintenance more convenient.
Hydraulic pumps generally should not bear radial loads, so they are often driven directly by a motor through a flexible coupling. During installation, the motor and the hydraulic pump shaft should have high coaxiality, with an error of less than 0.1mm, and the tilt angle should not exceed 1° to avoid additional load on the pump shaft and noise.
When using belt or gear transmission, the hydraulic pump should be relieved of radial and axial loads. Hydraulic motors are similar to pumps; some motors can bear certain radial or axial loads, but they should not exceed the specified allowable values.
The installation height of the hydraulic pump’s suction port is usually specified to be no more than 0.5m above the oil surface. Some pumps allow for a higher suction height, while others require the suction port to be below the oil surface. Pumps without self-priming capability need an auxiliary pump to supply oil.
Pay attention to the following when installing hydraulic pumps:
In addition to fluid connectors, auxiliary components of the hydraulic system also include: filters, accumulators, coolers and heaters, sealing devices, as well as pressure gauges, pressure gauge switches, etc.
Auxiliary components play a supporting role in the hydraulic system, but they should not be neglected during installation, otherwise, they can severely affect the normal operation of the hydraulic system.
When installing auxiliary components (the installation of pipelines has been introduced earlier), pay attention to the following points:
After the installation and precision inspection of the hydraulic equipment are qualified, it must be adjusted and tested to ensure that it can meet the various requirements of the production process under normal operating conditions and achieve the maximum production capacity of the equipment as designed.
After hydraulic equipment has been repaired, maintained, or reassembled, it must also be debugged before it can be used. The steps and methods for debugging the hydraulic system can be carried out as follows.
Before debugging, fully understand the structure, performance, work sequence, usage requirements, and operation methods of the equipment to be debugged according to the equipment manual and relevant technical data, as well as the connection between mechanical, electrical, pneumatic, and hydraulic systems.
Carefully study the functions of each component of the hydraulic system, understand the hydraulic schematic diagram, clarify the actual installation position, structure, performance, and adjustment parts of the hydraulic components on the equipment, analyze the pressure changes, speed changes, and power utilization of each work cycle of the hydraulic system, and familiarize yourself with the brand and requirements of the oil used in the hydraulic system.
Based on the above information, determine the content, methods, and steps of the debugging, prepare debugging tools, measuring instruments, and additional test pipelines, and formulate safety technical measures to ensure personal safety and avoid equipment accidents.
Both new equipment and repaired equipment need to undergo an appearance inspection to check for factors that affect the normal operation of the hydraulic system. Effective appearance inspection can prevent many faults, so a preliminary appearance inspection must be done before the test run. The main contents of this step are as follows:
Problems found during the appearance inspection should be corrected before adjustment and test run.
The adjustment and test run of the hydraulic system are generally not completely separate and are often carried out alternately. The main contents of debugging include individual adjustments, no-load test runs, and load test runs. At the installation site, some hydraulic equipment can only undergo no-load test runs.
A no-load test run refers to a comprehensive check of whether each hydraulic component, various auxiliary devices, and each circuit in the hydraulic system are working normally under no-load operation conditions; whether the automatic switching of work cycles or various actions meets the requirements.
The methods and steps for no-load test runs and adjustments are as follows:
1) Intermittently start the hydraulic pump to fully lubricate the sliding parts of the entire system, operate the hydraulic pump under unloading conditions (such as loosening the relief valve or placing the M-type directional valve in the neutral position), check whether the unloading pressure of the hydraulic pump is within the allowable value; observe whether its operation is normal, whether there is any harsh noise; whether there is excessive foam in the oil tank, and whether the oil level is within the specified range.
2) Operate the system under no-load conditions, first make the hydraulic cylinder piston top on the cylinder head or make the moving parts top dead on the stop iron (if it is a hydraulic motor, fix the output shaft), or use other methods to stop the moving parts, gradually adjust the relief valve to the specified pressure value, and check whether there are any abnormalities during the adjustment process of the relief valve.
Then make the hydraulic cylinder reciprocate with the maximum stroke multiple times or make the hydraulic motor rotate, open the system’s exhaust valve to discharge accumulated air; check the correctness and reliability of the safety protection devices (such as safety valves, pressure relays, etc.).
Observe the pressure of each oil circuit from the pressure gauge and adjust the pressure value of the safety protection device within the specified range; check whether the internal and external leakage of each hydraulic component and pipeline is within the allowable range; after running under no load for a certain period of time, check whether the oil level in the oil tank drops within the specified height range.
Since the oil has entered the pipeline and hydraulic cylinder, causing the oil level in the oil tank to drop, it may even expose the filter screen on the suction pipe above the oil level, or cause insufficient lubrication of the hydraulic system and mechanical transmission, resulting in noise. Therefore, it is necessary to replenish the oil in the oil tank in a timely manner. This issue is particularly important for mechanical equipment with large hydraulic mechanisms and pipeline capacity but small oil tanks.
3) Coordinate with electrical components to adjust the automatic work cycle or action sequence, and check whether the coordination and sequence of each action are correct; check the smoothness of movement during start-up, direction change, and speed switching, and there should be no crawling, jumping, or impact phenomena.
4) The hydraulic system should run continuously for a period of time (generally 30 minutes). Check the temperature rise of the oil, which should be within the allowable specified value (the general working oil temperature is 35-60°C). After the no-load test run is completed, the load test run can be carried out.
The load test run is to make the hydraulic system work under the predetermined load according to the design requirements. Through the load test run, check whether the system can achieve the predetermined work requirements, such as the force, torque, or motion characteristics of the working components.
Check whether the noise and vibration are within the allowable range; check the smoothness of movement during direction change and speed switching of the working components, and there should be no crawling, jumping, or impact phenomena; check the power loss situation and the temperature rise after continuous work for a period of time.
The load test run is generally carried out under one or two conditions lower than the maximum load first. If everything is normal, the maximum load test run can be carried out to avoid accidents such as equipment damage.
The adjustment of the hydraulic system should be carried out during the system installation and test run process, and some items should also be adjusted at any time during use. The following introduces some basic items and methods for adjusting the hydraulic system.
The main purpose of pressure testing the hydraulic system is to check the oil leakage and pressure resistance strength of the system and circuits. The pressure testing of the system generally adopts a step-by-step test, checking once at each level, and gradually increasing to the specified test pressure. This can avoid accidents.
Selection of test pressure: For medium and low pressure, it should be 1.5-2 times the usual working pressure of the system, and for high pressure systems, it should be 1.2-1.5 times the maximum working pressure of the system; in circuits with large impacts or severe pressure changes, the test pressure should be greater than the peak pressure; for rubber hoses, there should be no abnormal deformation under 1.5-2 times the usual working pressure, and no damage under 2-3 times the usual working pressure.
The following matters should be noted during system pressure testing:
Regarding the temperature issue of hydraulic oil during operation and debugging, it should be noted that the most suitable temperature for general hydraulic systems is 40-50°C. At this temperature, the efficiency of hydraulic components is the highest, and the oxidation resistance of the oil is at its best.
If the working temperature exceeds 80°C, the hydraulic oil will deteriorate early (the deterioration rate of hydraulic oil doubles for every 10°C increase), and it will also cause a decrease in viscosity, poor lubrication performance, easy destruction of the oil film, and easy burning of hydraulic components. Therefore, the working temperature of hydraulic oil should not exceed 70-80°C. When it exceeds this temperature, the machine should be stopped for cooling or forced cooling measures should be taken.
In low ambient temperatures, during operation and debugging, the viscosity of the hydraulic oil increases, pressure loss and pump noise increase, efficiency decreases, and components are easily damaged. When the ambient temperature is below 10°C, it is considered a dangerous temperature. Therefore, preheating measures should be taken, and the setting pressure of the relief valve should be lowered to reduce the load on the hydraulic pump. Normal operation should only be carried out when the oil temperature rises above 10°C.
With the development of hydraulic transmission technology, more and more equipment adopts hydraulic transmission, and its application range is also expanding. Many of these hydraulic devices operate outdoors all year round, exposed to wind, sun, and rain, and are greatly affected by natural conditions.
To fully ensure and exert the working efficiency of these devices, reduce the frequency of failures, and extend their service life, daily maintenance and care must be strengthened. Extensive usage experience shows that the best way to prevent failures is to strengthen regular inspections of the equipment.
Before a hydraulic transmission system fails, there are often some small abnormal phenomena. Through adequate daily maintenance, care, and inspection during use, these abnormal phenomena can be detected and eliminated early to ensure the normal operation of the system.
The main content of daily inspections is to check the status of the hydraulic pump before and after starting, as well as before stopping operation. Daily inspections are usually carried out using relatively simple methods such as visual, auditory, and tactile senses.
Large leaks are easy to detect, but small leaks at oil pipe joints are often not easily noticed. However, these small leaks are often a precursor to system failures. Therefore, seals must be frequently checked and cleaned. Loose hose joints on hydraulic machinery are often an early symptom of mechanical failure.
When a small leak is found at the joint of a hose and pipe due to looseness, the joint should be tightened immediately, such as the tightness of the threads at the connection between the hydraulic cylinder piston rod and mechanical components.
Before starting the hydraulic pump, check whether the oil tank is filled according to regulations, with the oil level gauge’s upper limit as the standard. Use a thermometer to measure the oil temperature. If the oil temperature is below 10°C, the system should run for more than 20 minutes in an unloaded state (with the relief valve in the unloading state).
When starting the hydraulic pump, use the method of starting and stopping repeatedly to raise the oil temperature. After the actuators operate flexibly, enter normal operation. If the pump has no output during the start-up process, stop immediately and check the cause. After starting the pump, the following checks should be performed:
1) Cavitation inspection
When the hydraulic system is working, observe whether the piston rod of the hydraulic cylinder has any jumping phenomenon during movement, whether there is leakage when the piston rod is fully extended, and whether there are abnormal noises from the hydraulic pump and relief valve under heavy load. If the noise is loud, it is the ideal time to check for cavitation.
The main cause of cavitation in the hydraulic system is air entering the suction part of the hydraulic pump. To prevent cavitation, all joints at the suction pipe of the hydraulic pump must be tightened to ensure the sealing of the suction pipeline. If the noise cannot be eliminated even after tightening these joints, stop the machine immediately for further inspection.
2) Overheating inspection
Another symptom of hydraulic pump failure is overheating. Cavitation can cause overheating because when the hydraulic pump heats to a certain temperature, it compresses the gas in the oil cavities, causing overheating. If overheating due to cavitation is found, stop the machine immediately for inspection.
3) Bubble inspection
If air leaks into the suction side of the hydraulic pump, this air will enter the system and form bubbles in the oil tank. The presence of bubbles in the hydraulic system causes three problems: first, it makes the movement of actuators unstable, affecting the volumetric modulus of hydraulic oil; second, it accelerates the oxidation of hydraulic oil; third, it causes cavitation. Therefore, it is crucial to prevent air from entering the hydraulic system.
Sometimes air can also seep into the hydraulic system from the oil tank. Therefore, frequently check whether the oil level in the oil tank meets the specified requirements and whether the suction pipe’s opening is submerged below the oil surface, maintaining sufficient immersion depth. Practical experience has shown that the oil return pipe’s opening should be about 10 cm below the lowest oil level in the oil tank.
When the system is operating stably, in addition to always paying attention to oil volume, oil temperature, pressure, etc., also check the working conditions of actuators and control components, and pay attention to the entire system for oil leaks and vibrations. After the system has been in use for a period, if adverse or abnormal phenomena occur and cannot be eliminated by external adjustments, disassembly and repair or replacement of parts may be necessary.
The hydraulic transmission system uses hydraulic oil as the working medium to transmit energy. After correctly selecting hydraulic oil, it is also necessary to keep the hydraulic oil clean and prevent impurities and dirt from mixing into it.
Experience has shown that more than 75% of hydraulic system failures are caused by hydraulic oil contamination. Therefore, controlling hydraulic oil contamination is very important. Contaminants in hydraulic oil include about 75% metal particles, 15% dust, and 10% other impurities such as oxides, fibers, and resins.
The most harmful contaminants are solid particles, which accelerate the wear of surfaces with relative motion, block small holes and gaps in components, and sometimes even cause valve spools to stick, leading to component malfunction. They can also block the filter at the hydraulic pump’s suction port, causing excessive suction resistance and preventing the hydraulic pump from working properly, resulting in vibration and noise.
In short, the more contaminants in the oil, the faster the performance of components in the system declines. Therefore, keeping hydraulic oil clean is an important aspect of maintaining the hydraulic transmission system. These tasks are not difficult but can yield good results. The following methods are recommended:
The hydraulic oil used in the hydraulic system has very low compressibility, and its effect can generally be ignored. However, low-pressure air has very high compressibility, about 10,000 times that of hydraulic oil. Therefore, even a small amount of air in the system can have a significant impact.
Air dissolved in hydraulic oil will escape from the oil at low pressure, creating bubbles and forming cavitation. In high-pressure areas, these bubbles are quickly crushed by the hydraulic oil, causing rapid compression, which generates noise in the system. Additionally, when the gas is suddenly compressed, it releases a large amount of heat, causing local overheating and damaging hydraulic components and hydraulic oil.
The high compressibility of air also causes actuators to crawl, disrupting smooth operation and sometimes causing vibrations, all of which affect the normal operation of the system. A large amount of bubbles mixed into the hydraulic oil can also cause deterioration and reduce its service life. Therefore, it is essential to prevent air from entering the hydraulic system.
Depending on the different reasons for air entering the system, the following points should be noted during use and maintenance:
The working temperature of the oil in the hydraulic transmission system of hydraulic machinery is generally best maintained between 30-65°C. If the oil temperature exceeds this range, it will have many adverse effects on the hydraulic system.
The main effects of rising oil temperature are as follows:
There are many reasons for excessive oil temperature. Some are due to incorrect system design, such as too small a tank capacity, insufficient cooling area, no unloading circuit in the system, causing the hydraulic pump to still overflow at high pressure when stopped, too thin and long oil pipes, too many bends, or improper selection of hydraulic components causing excessive pressure loss.
Some are manufacturing issues, such as low precision in component processing and assembly, excessive frictional heating between relative moving parts, or severe leakage causing significant volumetric loss. From the perspective of use and maintenance, the following points should be noted to prevent excessive oil temperature:
After a certain period of use, the hydraulic system may exhibit abnormal phenomena or malfunctions due to various reasons. When these cannot be resolved through adjustments, disassembly and repair or component replacement may be necessary. Apart from simple repairs like cleaning and reassembling or replacing seals or springs, major disassembly repairs should be done with great care, preferably at the manufacturer or a relevant overhaul facility.
When repairing, be sure to keep records. These records are valuable for diagnosing causes of future faults and can also serve as a basis for determining which spare parts are commonly used for the equipment.
Prepare the following common spare parts for repairs: hydraulic cylinder seals, pump shaft seals, various O-rings, springs for solenoid valves and relief valves, pressure gauges, pipeline filter elements, various pipe joints and hoses, solenoids, and diaphragms for accumulators.
Additionally, have the necessary documentation for repairs: hydraulic equipment user manuals, hydraulic system schematics, product catalogs for various hydraulic components, product catalogs for sealing materials, and performance tables for hydraulic oils.
After the pipeline system is installed, use dry air with a pressure of 0.6MPa to blow out all impurities in the system. Use a white cloth to check, and if there are no impurities within 5 minutes, it is qualified. After blowing, disassemble and clean parts such as valve cores, filter elements, and pistons.
Whether the system’s sealing meets the standards can be checked with an airtight test, generally by maintaining the system at 1.2 to 1.5 times the rated pressure for a period of time (e.g., 2 hours). Excluding errors caused by environmental temperature changes, the pressure variation should not exceed the value specified in the technical documents. During the test, adjust the safety valve to the test pressure. It is best to use a step-by-step testing method during the pressure test and always pay attention to safety.